3D Photography: Introduction
The cheapest/easiest/most-direct-and-approachable 3D is still good ol’ red/cyan anaglyphs, so we’ll start there. (We can get into some more bizarre-n-interesting like lenticulars later.) You’ll need:
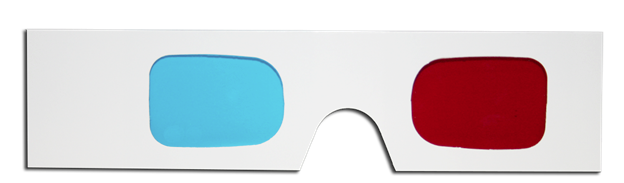
1. Red/cyan glasses, like

or
2. Photographs in left/right pairs. Yes, a smartphone to do this will do, and we’ll discuss technique. (There are, of course, some limitations – and specialized gear to overcome them – but for now let’s keep it simple.)
3. Some means of doing the color dance and combining the two images into one. Software does this, and while you CAN find smartphone apps, I prefer something more full-featured, like this bit of FREEware called StereoPhoto Maker:
stereo.jpn.org
(Download, unzip, launch.)
Shooting Pairs
To get started, we’ll use the time-honored Cha-Cha Method: you are literally shifting your weight to the left, shooting the left photo, then to the right and shooting that photo, such that the distance between the two shots (“stereo base”) is roughly the distance between your eyeballs. The fact that you’re using a single camera implies the first limitation: you’ll be shooting still-life. If it’s moving, this won’t work – you’ll need more specialized gear.
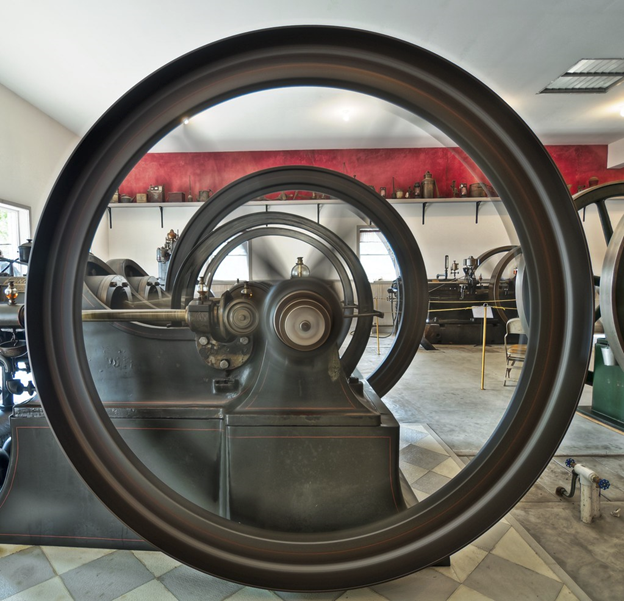
Example:
Left:

Right:

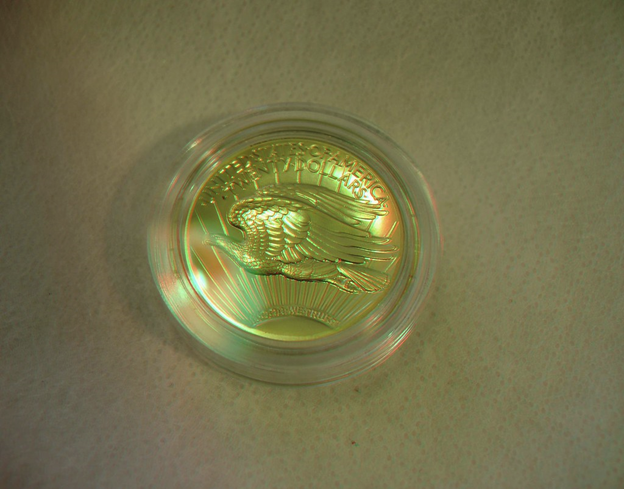
Does the stereo base always want to be eyeball-distance apart? Of course not – for macros (little things), the base wants to be considerably smaller, maybe a few millimeters, as for:
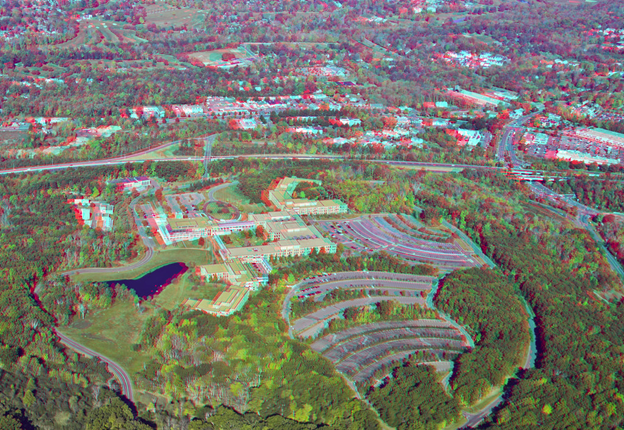
Conversely, shooting something really big – like a town – it wants to be wider. This one used Cha-Cha Via Airplane Motion:
Pair Your Pairs
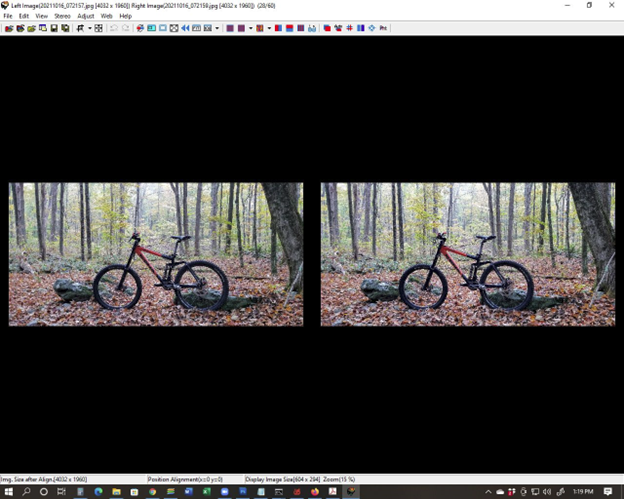
Open StereoPhoto Maker. Open your Left and Right photos.
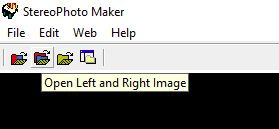
Now you have:
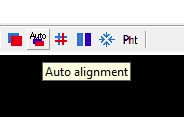
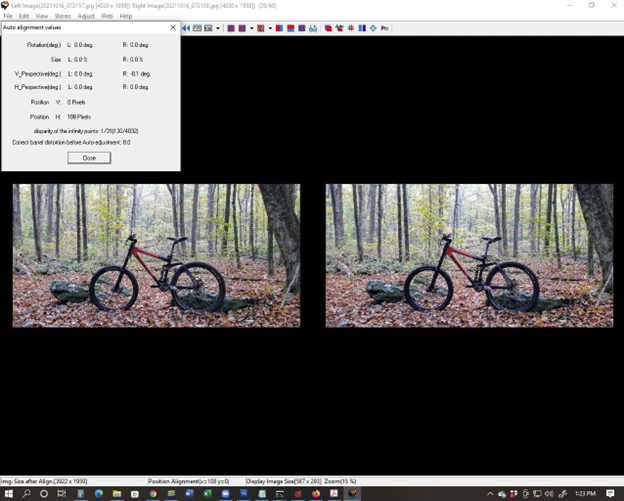
Since the Cha-Cha Method is very imprecise, we’re going to take advantage of the auto-alignment feature, which uses the SIFT algorithm:
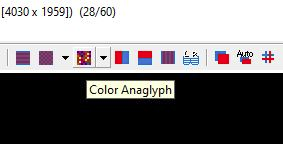
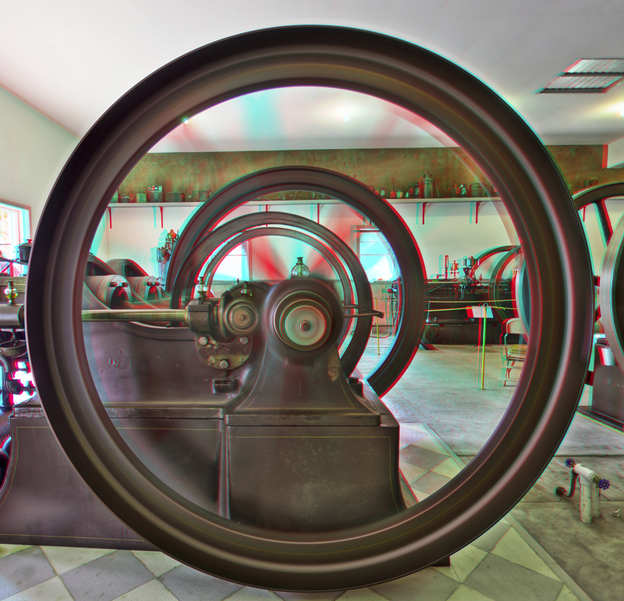
Now we can take a look using the Color Anaglyph button:
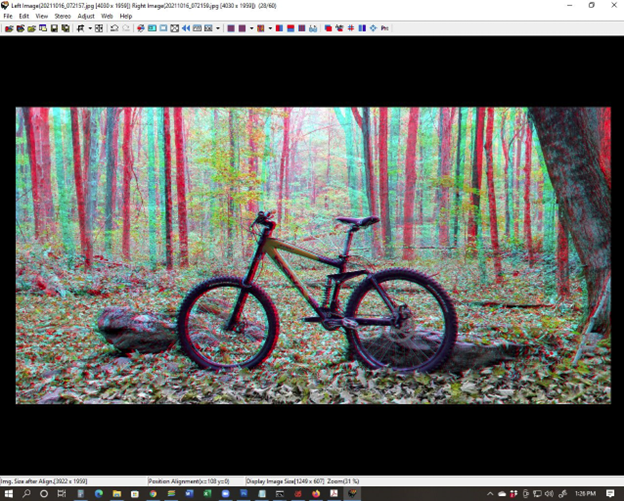
…and it’s okay but not great. Some basic adjustments:
Crop:

Easy Adjustment for positioning, especially pulling the image forward or pushing backward in the stereo frame:
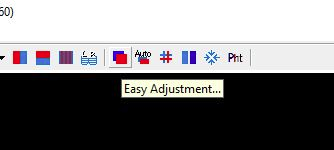

…which is what that slider at the top does. You’re looking to maximize stereo effect while not causing a “window violation” (something forward the stereo window that gets cut off by the border – it does freaky things to your brain).
Finally, that Color Anaglyph button can be used to select the rendering algorithm: straight, Dubois, ghost-reduced, … – best is to try several and see what looks best.
Finally:
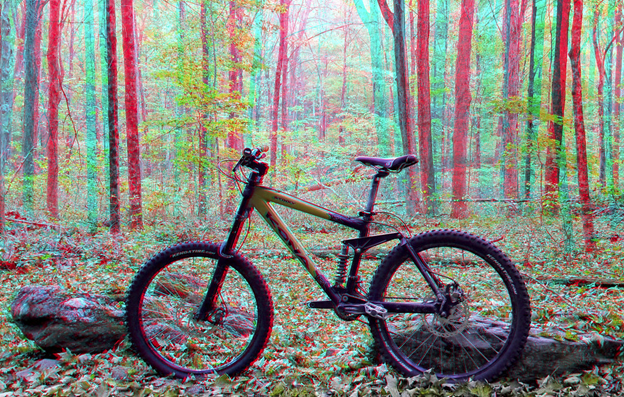
You can save both the anaglyph and the image pair. This, of course, can be combined with other photographic/Photoshoppery techniques. Example: HDR:
Flat:
Anaglyph:

While a major limitation to the one-camera technique is being unable to shoot subjects that aren’t still, sometimes that can become an advantage – the retinal rivalry can be used to imply a sense of motion. Example:
Flat:
Anaglyph:
A little Photoshoppery (masking):
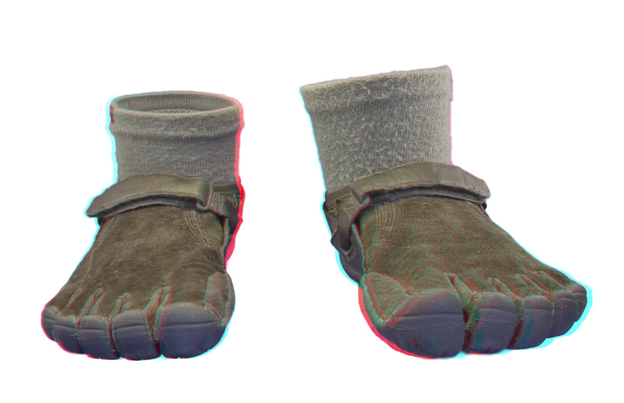
Here’s another example of macro stereophotography:
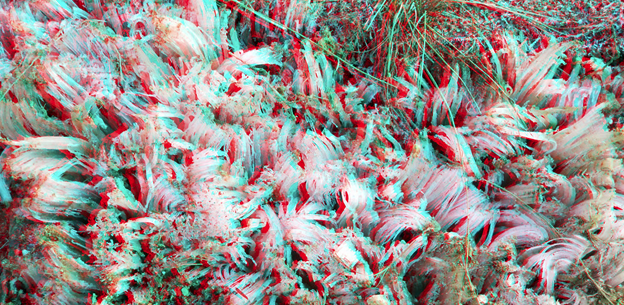
More examples of anaglyphs:

I have WMNR on in the office – presently they’re playing Offenbach’s Orpheus in the Underworld overture.
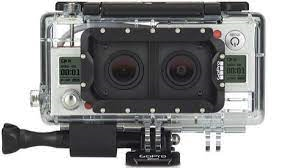
Which reminds me of one way to get around the motion restriction: a stereo photography rig, or GoPro:

More stereo video:
The big problem with anaglyphs is color distortion. One way around that is the stereoscopic pair as a classic stereogram:

The Good News: correct colorz!
The Bad: in printed form, they’re limited to the resolution of the print. AND, of course, they require “more extensive” equipment than paper anaglyph glasses. In the Olde Days, this took the form of a stereoscope:
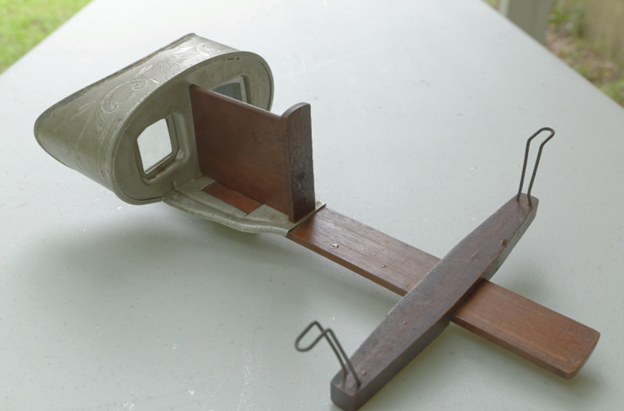
(and yes, I have one of those). There are newer paper versions with plastic lenses:

Or you could go high-tech and use something like VR goggles (or those cardboard things you can put your phone in to simulate VR goggles).
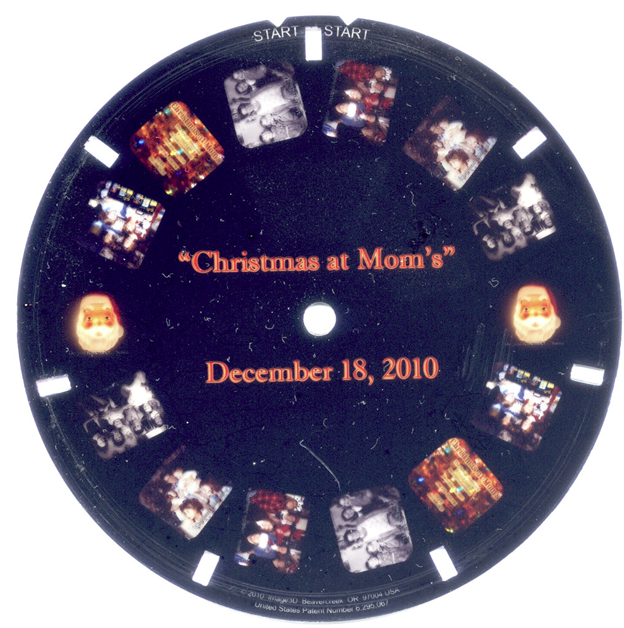
Edit: lest we forget, there’s this variation on that theme:


More examples of parallel stereo:

In any instance, the good colors come at the cost of more gear (even if just the little Loreo viewer). So it’s not something you can hand out (or send as a Christmas card to the several hundred recipients on your list). Is there a way of have good colors in a medium that you can look at without needing ANY extra gear (even the red/cyan glasses)?
There is! Next up: LENTICULARS!
One last thing before moving off of anaglyphs… here’s a crapton of ’em:
One final thought before moving on to lenticulars…
High Dynamic Range.
The stereotype is something that looks like:

or

with super kicked up and overblown fine details and colors.
What it is, though, is a technique for overcoming the inherent limitations of our gear to capture degrees of light we can see, usually via multiple exposures of the same subject (once again, implying still life or very still landscape).
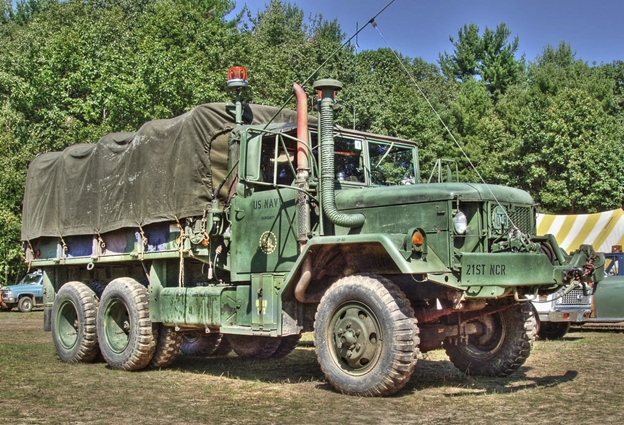
Example: here’s the Thomas Oyster House exhibit at Mystic Seaport, as HDR:
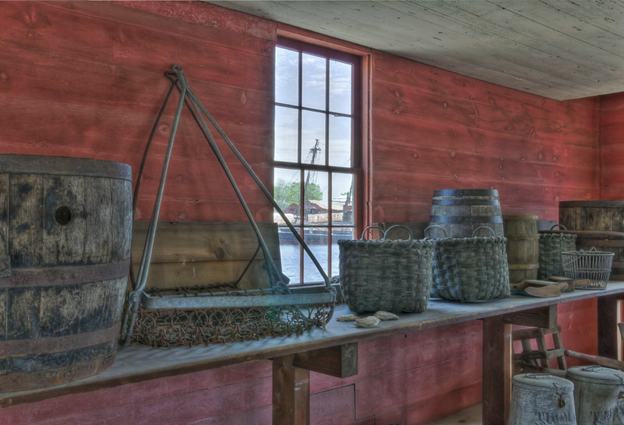
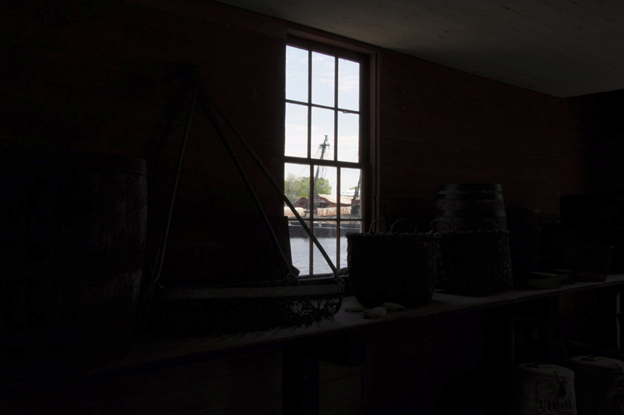
Walking in the room, you’d be able to see the contents clearly, as well as the scene of the seaport through the window. A standard digital camera shot, though, would look like:
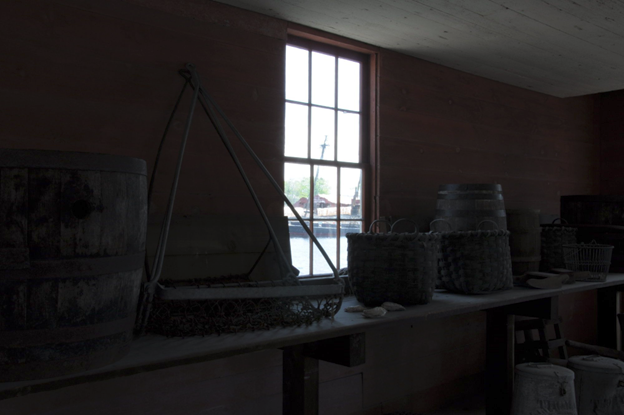
The interior of the room is dark, while the scene through the window is still so light as to be mostly blown out.
The remedy: set the camera to aperture priority (i.e. hold aperture size fixed* while allowing exposure time to vary), and take a bracket of three shots: 0 EV, -2 EV (dark), and +2 EV (light).
* This lets you select depth of field – the smaller the aperture, the greater the DoF (and longer the exposure time). We’ll revisit depth of field discussing lenticulars.
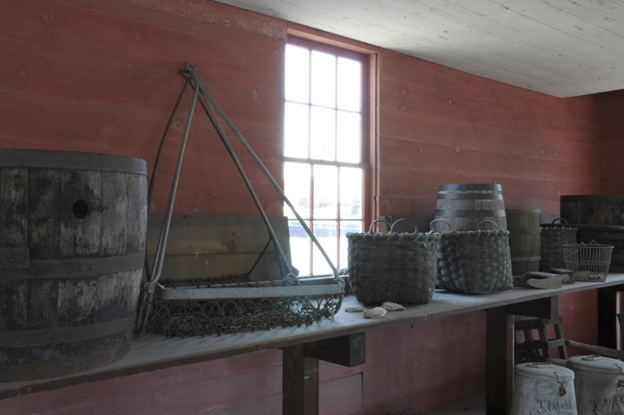
Here’s dark (-2 EV):
Here’s light (+2 EV):
These three are combined again using software – I use Photomatix:
Download HDR photo editing program Photomatix Pro
Create HDR photos with the look you want, from natural to artistic, using one-click presets and a large range of settings. Includes advanced editing features and a Plugin for Lightroom.
www.hdrsoft.com
This takes three image files which are 16-bit per pixel per color channel (red, green, blue), and creates one HDR file which is 32-bit per pixel/color.
Thing is, that HDR file cannot be looked at directly on a standard monitor or printed to paper, since it’s beyond the dynamic range of those output devices. So you have to map the information in the HDR file back to something that can be rendered by them. This is tone mapping, and can be used to enhance detail (since there’s a lot of image information in that HDR file), brightness/color contrast, … and is an occasion of much HDR sin.
What does this have to do with 3D? Well, you can do it twice for left and right channels (or multiple times for lenticular – more on that to follow), which brings out all sort of details which weren’t there in the single (0 EV) shot.
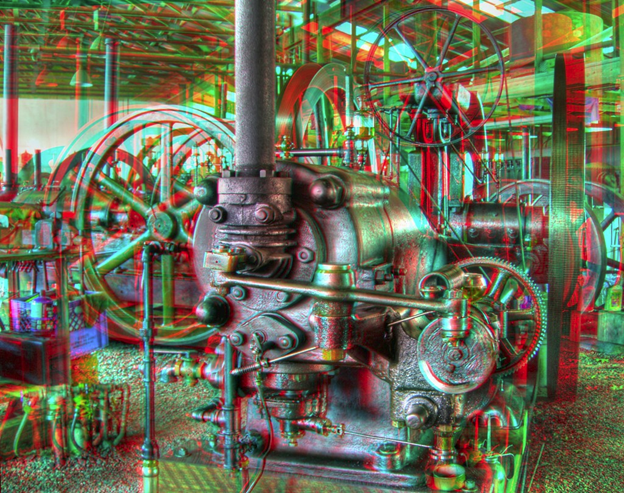
More HDR (flat and anaglyph):

Since HDR requires the camera be still for all shots of the bracket (especially the long-exposure light shots), you’ll really want to use a tripod. For 3D, a slider would also come in handy (more on that in the lenticular discussion). A couple of final(ish) thoughts on HDR:
You can, of course, do other things with it, too, like animation. Here’s a sunrise at the Rockhouse overlook above the Housatonic River last spring. It’s over twenty-three frames, each a bracket (0, -2, +2 EV) processed into HDR then tone-mapped twice into a bland “fused” version and a snappy “details-enhanced” version. All five pulled into Photoshop as layers and blended to create a final frame. Times twenty-three. Then the twenty-three were sequenced into an animation with Sony Vegas Pro.
As for more thorough HDR tutorials: I’ll leave that up to the King of HDR, Trey Ratcliff:
HDR Tutorial – How to Make Beautiful HDR Photos with Ease! – Stuck in Customs
Ironically, Trey is blind in one eye, so a lot of my 3D stuff would be lost on him… EXCEPT perhaps my lenticulars… Otay, now, time for:
Lenticulars
You know what these are: they have a plastic lens with a bunch of ridges (lenticules) which either run horizontally or vertically. If horizontal, they’re used for animation, the simplest being an image flip:

But with the lenticules vertical, they can be used for 3D.
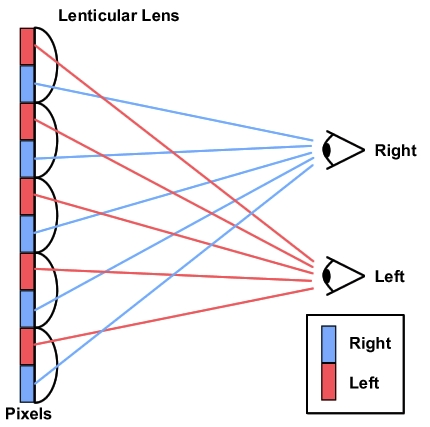
Unlike anaglyphs, there is no color distortion, and (assuming you’re willing to do the work of attaching the lens) there’s no chunky extra gear required, unlike the classic stereograms where you need a viewer of some sort. And lenses can be purchased inexpensively enough to pass the Christmas Card Test, i.e. would it be reasonable (affordable) to send them to several hundred on the card list. (I have.)
That said, they have drawbacks of their own. First and foremost, you need to be willing to put in some extra work, including affixing said lenticular lens to the print (which can be a PITA), but even before that, in generating the image. Lenticulars require more than a simple left/right pair – they want several and many intervening images. Like a dozen or more.
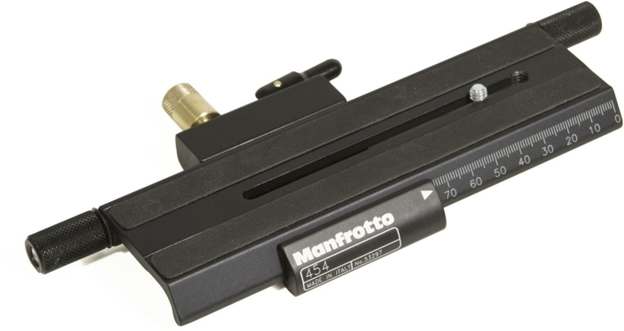
There are two ways to get all those all-the-way-left thru all-the-way-right images. The first way, of course, is to shoot, say, a dozen images over a set displacement, like a centimeter per. That’s my preferred method, and I use the camera mounted to a graduated slider – this one:
The “cheater” method is to take a stereo pair and use software to interpolate the intervening images (usually via creation of a depth map from the pair). Sometimes it works well, sometimes the nature of the image is such it doesn’t.
Okay, so let’s take the former case: shooting a lenticular as such. Here’s my mother’s Crolly doll:

Twelve shots were taken, and that flat shot was actually frame #5. For those of you who are following along at home with anaglyph glasses, here’s that version using frames 5 and 8:
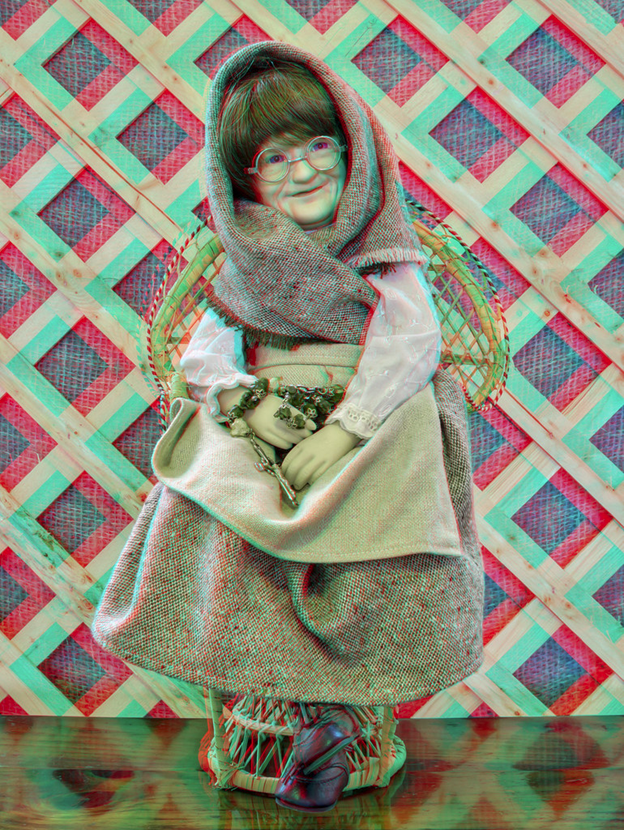
But again, for the lenticular, there were twelve.
Here’s a tutorial on lenticulars, which includes a technique for aligning the images using Photoshop:
3D Lenticular Printing Interlacing Algorithm Using Photoshop
This paper presents a 3D Lenticular Printing interlacing method using Photoshop.
www.vicgi.net
Frankly I’m too lazy, so I have software that does it (and other things) – from (gasp!) a Russian company:
3DMasterKit | triaxes.com
One of the things the software does is produce calibration sheets.. The original reason I bought my first wide-carriage high-end photo printer was to be able to print the calibration sheets, since a 60 lines-per-inch lens may, in fact, be 60.09 or whatever… at the temperature in my office right now.
Anyway, the two common pitches for lenticular lens sheets are 40 and 60 LPI. More often than not, 40 is used for animation and 60 for 3D. As a rule, the finer the lens (higher the LPI), the more depth-of-field you’ll have in your final product. (Commercial rigs can print directly on the backsides of lenses, which can be 100+ LPI.)
And since we’re talking numbers like 40 or 60 (or even 100) LPI, versus 300+ DPI, that implies another drawback of lenticulars versus anaglyphs or classic stereograms: they are lower resolution. You’re not going to have the kind of fine detail as with the other methods, at least horizontally.
So twelve frames of Eileen yield this lenticular image:
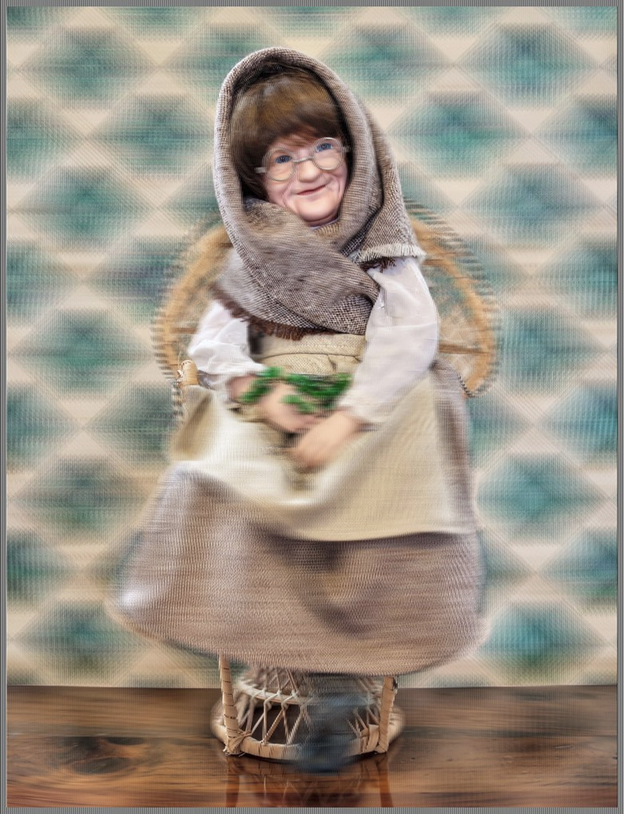
Here’s a close-up of one eye – the stripes corresponding to the lenticules are obvious:
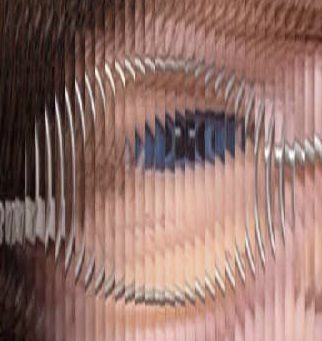
You won’t get the 3D effect, of course, without the lens:
Of course, I left the clear removable backing sheet on so I could slide the lens around… which brings us to the PITA part: affixing the lens to the print such that it is straight and the “sweet spot” is perpendicular to the sheet (or as close as possible). What I’ve been doing: putting a couple loops of Scotch tape – one on either side – onto the backing sheet to act as pull-tabs, pulling just the top inch or so off and looping it under the lens, resting the lens on the print such that the bottom touches and it rests on the looped-under backing sheet up top, pressing the bottom down to align using those lines printed along the sides (the idea is you want them to be SOLID, not black&white waves), and, when I’m happy with what I have – including the “sweet spot” – pressing up to the top to affix the adhesive from the lens to the print. Then I use a cold laminator press: holding those Scotch tape pull-tabs while I feed the top into the rollers, while slowly and gently pulling the sheet away while the lens+print feed through.
PITA as I said, and there’s a share that get goofed and don’t meet my quality standards.
Since the lens will include, if nothing else, those alignment lines stripes on the sides, the finished product wants to be trimmed – I have a Rotatrim cutter for this (which admittedly wasn’t really designed to cut plastic lenticular lens sheets).
Oh, as for source for lenses: I’ve been getting mine from VueThru:
VueThru.com3D and Flip Lenticular and Photo System
The leader in Flip and 3D lenticular, event photography and social sharing. 
Providing equipment, software, training, supplies & more to the industry since 2000! Free SuperFlip Lenticular software link on this page.
vuethru.com
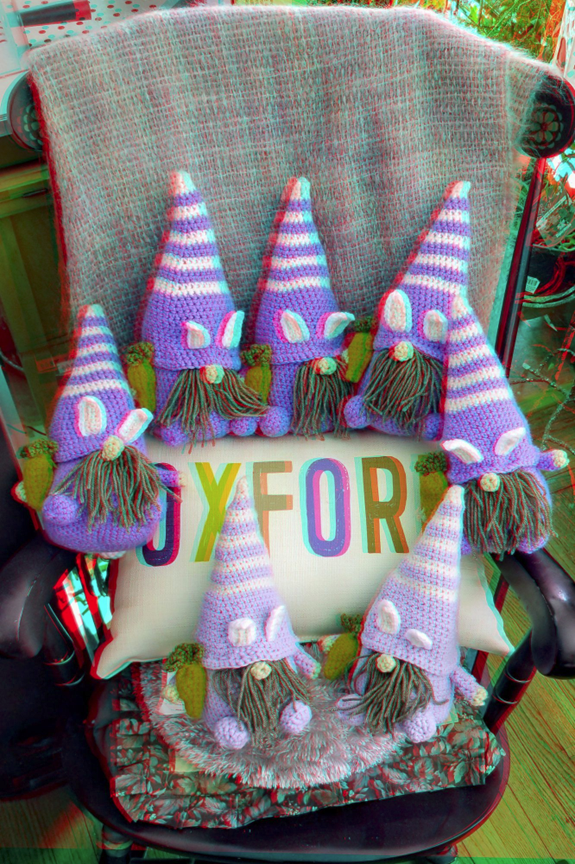
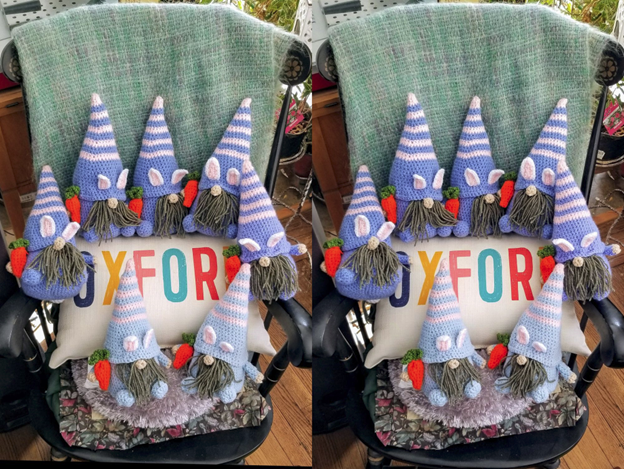
My mother decided to make some Easter gnomes for her sisters and a couple of nieces. So here they be, in stereo two ways (anaglyph and classic):
So…
I’ve given y’all enough tools to do this – let’s see some of yours. Moving on…
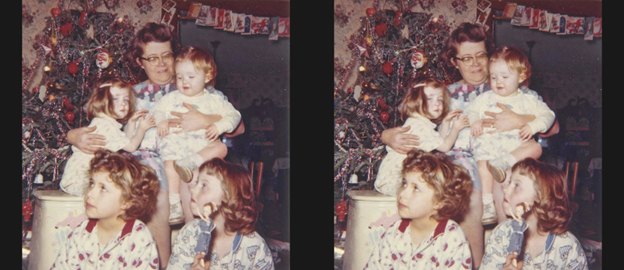
Let’s say you have something NOT in 3D, that you really, REALLY want in 3D. Say, a beloved old family photo:
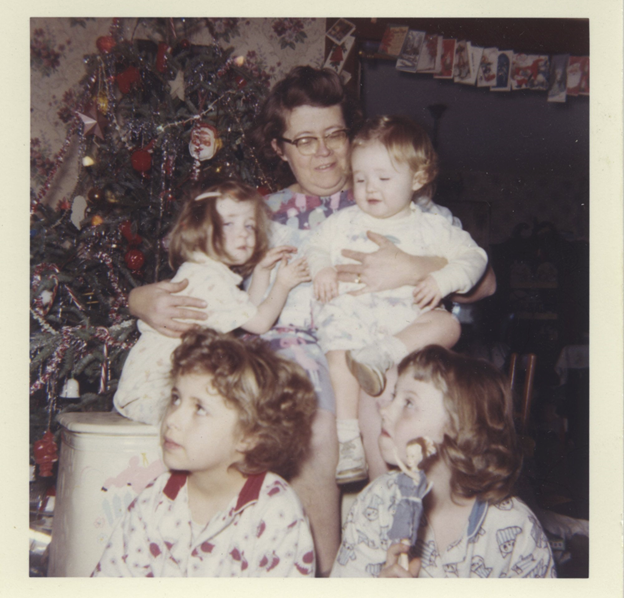
Flat as a pancake.
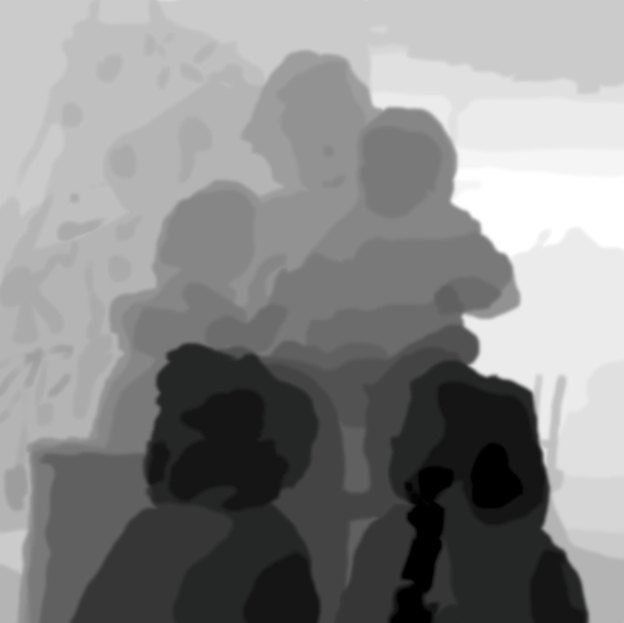
The “solution” such that it is, is the 3D analogue to colorization: build a depth map, then create a displacement of the original photo using that depth map.
A “depth map” is merely a grayscale image where the shade of gray implies the distance from the viewer. In this case, the closer it is, the darker it is:
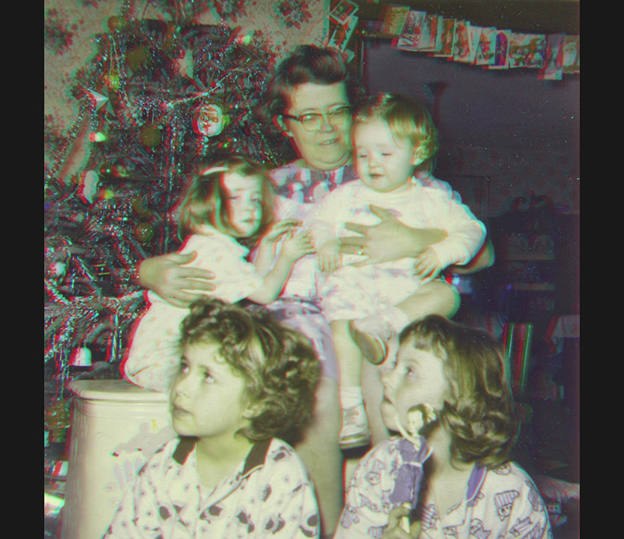
In Photoshop, you’d use the Filter -> Distort -> Displace, with vertical set to 0 and horizontal depending on what degree of depth you need. You can even do this for different displacements for creating a lenticular, if desired. Some images work better than others, depending on what’s being displaced and what’s behind it (and the degree of displacement). Again, it’s a fudge, but better than nothing when you really, REALLY want it 3D.
Thus (and yes, I punched up the colors a bit, too):
Here’s another: original photo of friend of the family on a fishing trip:

Depth map:
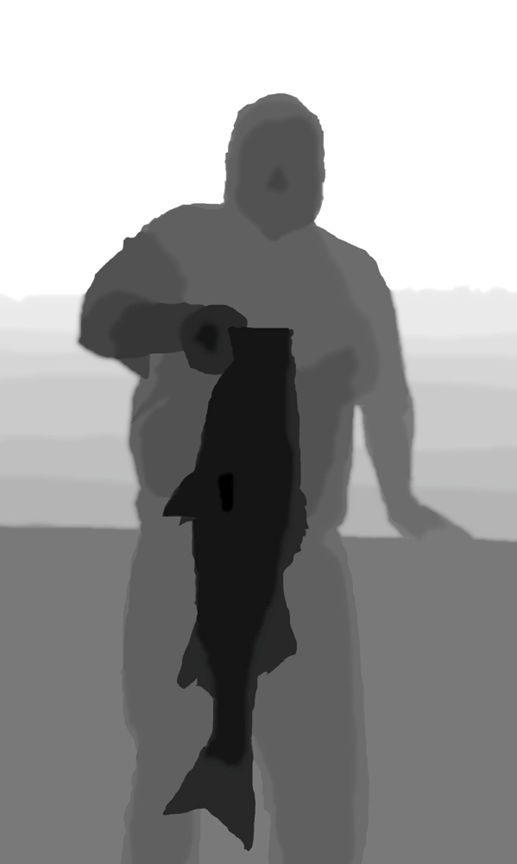
This time, the intended destination was a lenticular, so twelve images (original plus 11 generated) were created. I put the twelve in a rocker animation as-is, just to demonstrate some of the funky distortion that happened. (I’d want to clean that up best as I could before doing anything with it for real):
